Tuesday, 23 August 2011

Coffee cake for a special lady

Last week it was a very special person's birthday, my mum, so of course I had to make her a birthday cake. She loves coffee cake, so I grabbed my favourite recipe book from the shelf (which I actually 'acquired' from her). It's called 'The Love of Cooking', and was published in 1972. It is very dog-eared, but I love it all the same, and it has some of my most trusted recipes.

I wanted to make a nice, simple but delicious cake, so I adapted a recipe from the book and here was the finished result:


The recipe and method was as follows:

200g butter
200g caster sugar
4 eggs
200g self-raising flour
4 teaspoons instant coffee (I just used coffee mixed with a drop of hot water, but by all means just use coffee flavouring-I suggest adding more or less coffee to suit your personal tatse)
If desired, you could also add around 50g chopped walnuts

  • Pre-heat oven to 180C and grease and line a 7cm round tin (you can split the mixture between 2 tins, or bake in one and cut in half once it's cold to fill - again it's down to personal taste!)
  • Cream butter and sugar with coffee flavouring until light and fluffy
  • Beat in eggs one at a time, adding a tablespoon of flour with each
  • Fold in the rest of the flour
  • Bake near centre of oven for around 20-25 mins until golden
For the icing, I made a simple coffee flavour buttercream, which as usual I just threw together until it looked (and tasted!) right. By estimation I think I used around about the following amounts:
  • 125g butter
  • 250g icing sugar
  • 2tsp coffee flavouring
That is just a rough guess, so I suggest adding icing sugar bit by bit until you get the consistency you want!

I finished by filling and covering the cake, and gave it a light dust of cocoa powder. I then made some dark chocolate coffee bean shapes, using a mould I bought when I visited the amazing Cadbury World last year (chocoholics heaven!) and voila! Birthday cake for my mum :)


Thursday, 28 July 2011

I'm back! With gardening cupcakes and a new kitchen addition...

Oh dear. I'm very aware it's been over a month (!) since my last post; quite shameful. Unfortunately I seem to have had a run of bad news, and blogging has fallen by the wayside.

However I'm back to try and redeem myself, and to share some of my latest cakes. These were garden/gardening themed cupcakes in honour of someone very special to me, and they are just oh so cute. There was sadly one or two casualties with my toppers (sunflower petals and carrot leaves falling off), but I was really pleased with the ones that made it.

Here is a picture of some of the toppers halfway through progress...

The spades were the hardest to make, and to get the silver 'metal' half to stick to the brown 'wooden' half. I also would have preferred a lighter silver colour for them, but this glittery grey was all I could get my hands on. I still love them.

My favourites were the sunflowers; sunflowers hold a lot of happy childhood memories for me, and these toppers were so easy to make, yet so pretty.


I wish my bad photography did them justice! I used a small PME daisy plunger cutter, and cut flowers from yellow fondant, then coloured the remaining yellow with a tiny bit of orange colouring paste, then cut flowers from that. I layered the orange tinted flowers with the yellow on top. Then just a tiny dark brown circle for the centre, which I pricked with a cocktail stick several times to give the impression of the sunflower seeds. 


The finished cupcake looked lovely.

For some reason I can't get my photo of the full lot of finished cupcakes to load, but here's a few individuals. There were also tiny apples and pears...


And mini carrots...


Alongside the roses and the spades.

I also seem to have a constant gripe with cupcake/muffin cases. First it was the foil case catastrophe. These latest ones I tried out seemed to sort of...stretch out when I took them out of the packet and put them in the muffin tray. Instead of neatly sitting in the muffin tray, then seemed to expand, and the creases unfold of their own accord. It was really irritating because when I then went on the pour the cake mixture in, the cases folded in on themselves - not a good look, difficult to pipe on the top of the cupcake, and leaves a funny shape. Please someone recommend some good muffin cases!

And lastly I have a happy new addition to my kitchen, which I am really loving so far...


It's a lovely little Kenwood mixer. Now I know it's no Kitchen Aid, but there is an economic downturn don't you know! 
I promise to try not to leave it so long between posts next time :)

Thursday, 16 June 2011

Indulgent Toblerone Cheesecake

I'm aware that so far my whole blog has been very cupcake orientated; it's not that I don't like other cakes, it's just that I don't make them very often, and cupcakes are definitely more my forté. Nevertheless, this week I have revisited an old favourite recipe of mine. It came from a local chef, who owns a restaurant in my village, and I've been making it for a couple of years now. Along the way I've tweaked the recipe ever so slightly to suit my own taste, so here it is, Toblerone cheesecake:


Recipe and method as follows:

30g unsalted butter
10 chocolate digestives
250g philly cheese
200ml double cream
50g caster sugar
70g Toblerone, melted
70g Toblerone, chopped 
(you can add more or less chopped Toblerone, depending on how chunky and chocolately you want your cheesecake to be!)

  • Crush digestives in a bowl to a fine crumb, melt the butter and combine well with the biscuits. Cling film a sandwich tin, and press the biscuit in a layer along the bottom. Flatten down well and refrigerate to set.
  • Mix the caster sugar and cheese in a bowl and put to one side.
  • Whisk the cream in a seperate bowl.
  • Melt 70g of Toblerone, and once it has cooled slightly, stir into the cheese mix.
     Then fold in the 70g of chopped Toblerone and whisked cream.
  • Pour the mixture on top of the biscuit layer and refrigerate to set.
  • Dust with cocoa powder to finish!
It's not the most aesthetically pleasing cake I've ever made, but it's super easy, and so so tasty. It makes a really lovely chunky cheesecake, definitely one for those with a sweet tooth (like me!).

I enjoyed my slice with a puddle of cream :) 

Tuesday, 7 June 2011

Heavenly Vanilla Bean Cupcakes

So it's been about two weeks since I blogged last, and my aim was to blog at least once a week, so I've missed the boat on that one already! That means it's also been about two weeks since I baked any cakes, and I swear even my oven was beginning to give me dirty looks, let alone my cake-starved friends...

What I have done in the last two weeks is use Astral's great tips over at her blog The Art of Being Perfect, and make myself up some vanilla sugar. Here it is:


Not much to look at, but the smell when I open the jar is fantastic. The vanilla pods are buried inside the sugar, I promise.

And the cakes I decided to bake, now I have my vanilla sugar, were also from Astral's recipe.

I hold my hands up and admit, I have never used vanilla bean paste before, only extract, and the effect that this had on my cakes was phenomenal. From the cute little specks of the bean in the mixture to...oh yes, the taste. Say hello, because my inner domestic goddess has arrived!

This was the last of the mixture, I just remembered to photograph it before I used it all up. 

I would like to say a massive thank you to Astral for introducing me to the best vanilla cupcake recipe ever. And I've been around the vanilla cupcake block a few times. These were mouthful of light, fluffy, vanillary heaven (is vanillary even a real word? Who cares!) I actually managed to get a generous 14 cupcakes out of this mixture.

The vanilla buttercream was equally as divine, lusciously thick and creamy as promised. My icing spirals didn't pipe great, but practise makes perfect, so hopefully one day they will be! 

This is definitely a recipe I would love to use time and time again; simple, yet delicious, so a huge thank you again to Astral for sharing it.

For the decoration, I took inspiration from a cake I saw on my new favourite TV programme, Cake Boss, and went for gambling/casino themed cupcakes. I made cubes and circles out of fondant icing, drew the numbers of the dice on the white cubes with a black food colouring pen, and attempted to make poker chips. I borrowed the design for the chips from an poker kit I've got here at home. They weren't perfect, but they looked pretty cute, and I was pleased with them.


Let's wait and see what my chums at work think of them tomorrow!

Friday, 27 May 2011

A cake to remember

This week I was unbelievably chuffed when a friend from work asked me to make 21 cupcakes for her daughter's 18th party. I was more than happy to oblige, but the pressure was on because I knew they had to be perfect!

She absolutely loved my orange cakes with the roses, so i went for 10 of these, and 11 lemon cakes.

I made these cakes in some pretty purple cases I bought from one of my fave baking supplies shops, Almond Art, made by Foilcraft...let me tell you, I could not recommend them less. They were truly shocking from the moment I took them out of the packaging. Now I don't want this blog post to turn into a moan, but I need somewhere to vent my anger! My orange cupcakes came out beautifully and, as last time I made them, rose to perfection.

Sadly, my cakes were spoilt by these awful cases. The purple colour rubbed off on my hands when I picked them up, the purple bled through to the inside of the case and purple came off into my muffin tray, permanently staining it. I was devastated. But my hands were tied, and I had no other cases at 10pm the night before the cakes were due, and I had to stick with them (I get up for work at 7.30am so I had no choice!). I unwrapped a few cakes, and the purple hadn't rubbed off onto the cakes (thankfully). All I could do was apologise profusely to my friend for the awful, awful cases and hope it didn't put her off my cake. I should have known from the moment I took them out of the packet they would be no good, each case had rubbed the purple colouring onto the one underneath, and I had to forcefully pry each case apart. Needless to say, I will never buy these cases again. I can't fault anything else I've bought from Almond Art, and think it was a problem with the manufacture.

Anyway, apologies, rant over so onwards and upwards!

The lemon cake recipe was as follows (made 12 cupcakes overall):

115g self-raising flour
1/2 tsp baking powder
115g butter
115g caster sugar
2 eggs
Finely grated rind of 1/2 a lemon
2 tbsp milk

  • Preheat oven to 180 degrees
  • Beat butter and sugar with lemon rind
  • Beat in eggs, one at a time, then beat in milk
  • Sift flour with baking powder and fold into mixture
  • Bake for 15-20 mins until golden brown
Nice and simple!

I piped swirls of lemon flavour buttercream, coloured with 2 teaspoons yellow food colouring, (shoved it all in the bowl and mixed until it looked right as usual!), and sprinkled with hundreds and thousands. I also cut out blue fondant butterflies as toppers.


For the last cake, I cut out a white fondant circle, and wrote an 18 on the top using a food colouring pen, iced with Sainsbury's glitter writing icing, and finished off with pink glitter sprinkles. This cake was to sit at the top of a cupcake tree.


Here's the lemon, all boxed up and ready to go.


And three of the orange cakes with roses, and the special 18 cupcake.


Both mum and daughter seemed really happy with them. The party is tonight so I will await feedback on Tuesday, and hope they were as chuffed as they looked when I handed the cakes over!

Monday, 23 May 2011

Some juicy cupcakes

Last week I decided to go for an old favourite recipe of chocolate orange cupcakes from a generic cupcake recipe book. The book says this mixture makes 16 cupcakes...they must be really stingy because I just about scrape 10! I wish I had doubled up but I didn't, and 10 cupcakes were never going to make my chums at work happy on a Friday afternoon, so I also made plain orange cupcakes.

I had never made orange cupcakes before, and I just took a recipe for orange cake but split it into cupcakes. OH.MY. I am a complete chocolate obsessive but I loved these plain orange cupcakes. They rose to perfection (for a change!) and were soft, light and fluffy.


Recipe for chocolate orange cake:

115g butter
115g golden caster sugar
inely grated rind and juice from 1/2 orange
2 eggs
115 self-raising flour
25g plain chocolate, grated

  • Preheat oven to 180⁰.
  • Put butter, sugar and orange rind in a bowl and beat together until light and fluffy.
  • Gradually beat in eggs.
  • Sift in the flour and, using a metal spoon, fold gently into the mixture with orange juice and grated chocolate.
  • Bake cupcakes for around 20 minutes, until risen and golden brown.
Very sweet and simple!

The recipe for the orange cake came from Australian Women's Weekly Cupcakes & Baking book. I basically used the mixing method above, but with the following ingredients (technically a cake recipe, but made about 16 deliciously huge cakes!):

150g butter
1 tbsp finely grated orange rind
(I added a splash of fresh orange juice too)
150g caster sugar
3 eggs
225g self-raising flour
60ml milk

I couldn't tell you the recipe for my frosting, because usual I chucked everything in haphazardly until it looked right. Anyway, to decorate the chocolate orange, I piped a simple chocolate buttercream and put a Malteaser in the middle. For the orange cupcakes, I used the rest of the fresh squeezed orange juice to make an orange buttercream, and decorated with fondant roses, using this fantastically easy tutorial from Almond Art. I then piped leaves using a Wilton #67 tip...as you can see from the pictures, I have yet to perfect the technique of piping leaves, and cake photography! Still, I was pretty chuffed with these cakes, and they were delicious.

Monday, 16 May 2011

Red Velvet Cupcakes

I've heard a lot about red velvet cupcakes, and lots of people seem to rave about them, so I thought it was about time I gave them a go...they made a right mess! My finger was just one casualty of the red food colouring.
I used the recipe from my Hummingbird Bakery book, except I had no white vinegar so I used cider vinegar instead which is just a little sweeter, and some recipes call for it rather than white vinegar.

This recipe called for a LOT of beating. Now call me old-fashioned, but I've always been taught (mainly by my mum who is also a baking enthusiast) and by all of her 70s cookbooks, to fold flour gently into the mixture right at the end, to trap the air and ensure your cakes rise to perfection. So I was a bit dubious about all this high speed whizzing Hummingbird Bakery suggested - but I guess they are experts! Unfortunately my cupcakes rose rather unspectacularly. I seem to have somewhat of an issue with cakes that hardly rise though, and I think the problem is more to do with my cranky old oven than the recipes/techniques I'm using. Any tips would be very welcome though, as replacing the old oven isn't an option at the moment!

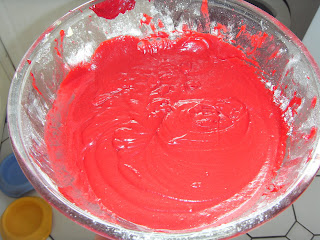
Anyway, this picture doesn't do the mixture justice - it was a brilliant blood red!


The recipe said bake for 20 - 25 minutes, but I took mine out after 20 and thought that was just a little too long; 18 or 19 minutes would have been just right.

I piped these with a simple vanilla buttercream, but I've heard cream cheese frosting is the traditional topping for red velvet cupcakes. I tend not to use a recipe for buttercream and have a habit of throwing everything in until it looks right. But here is the recipe for the cupcakes (not exactly as it appears in the Hummingbird Bakery book as they are very descriptive and I'm a lazy typer!) my notes in italics:

60g unsalted butter
150g caster sugar
1 egg
1 tbsp cocoa powder
2 tbsp red food colouring
1/2 tsp vanilla extract
120ml buttermilk
150g plain flour plus 2 tablespoons
(I don't know why the extra 2 tablespoons...)
1/2 tsp bicarbonate of soda
1 1/2 tsp white vinegar (or cider vinegar in my case!)

  • Preheat oven to 170⁰C.
  • Beat butter and sugar on a medium speed until light and fluffy. Turn the mixer up to a high speed, and slowly add egg and beat until everything is well incorporated.
  • In a separate bowl, mix the cocoa, red food colouring and vanilla extract to make a dark thick paste (I found it wasn't quite 'paste' like...slightly runny) add this to the butter mixture and mix thoroughly until everything is evenly combined and coloured.
  • Turn mixer to a slow speed and pour in half the buttermilk. Beat until well mixed, then add half the flour and beat until everything is well incorporated. Repeat until all buttermilk and flour has been added.
  • Turn mixer to a high speed, and beat until you have a smooth, even mixture. Turn the mixer to a slow speed and add the bicarbonate of soda and vinegar. Turn up the speed and beat again for a couple more minutes.
  • Spoon into cases and bake for 20-25 minutes (I think 18 or 19 would be enough)

And voilà! My finished cake, topped with a red fondant heart. They looked quite pretty and wow, they tasted good! I will be making red velvet cupcakes again, very soon hopefully, but perhaps with a slightly different recipe next time...